5 Essential Tips For Baseball Glove Repair: Extend The Life Of Your Favourite Glove

5 essential tips for baseball glove repair

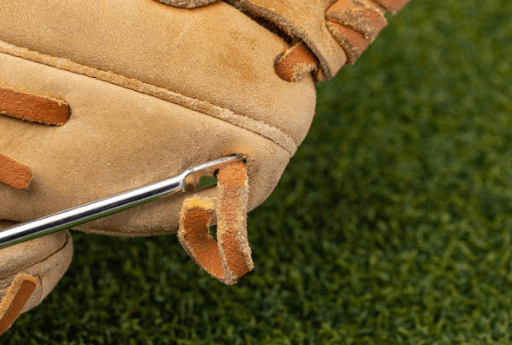
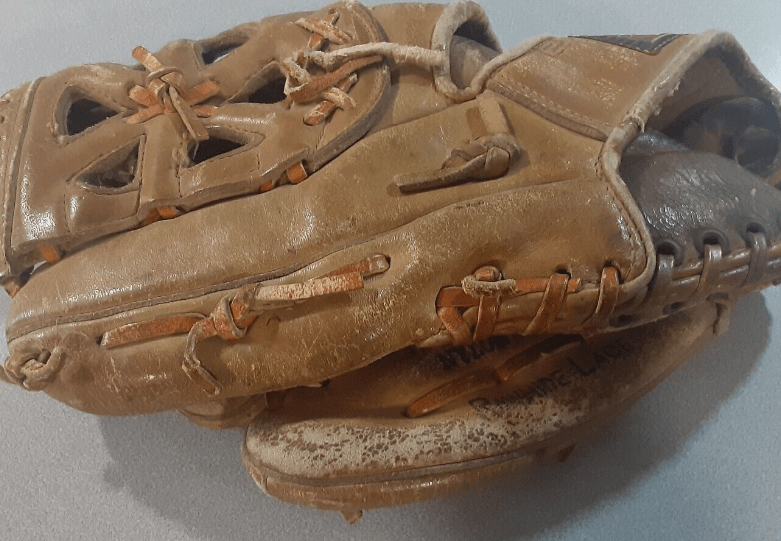
Are you an avid baseball player or fan? If so, you know how important a good baseball glove is. It’s not just an accessory, but an extension of your hand on the field. Over time, though, constant use and wear can cause your favorite glove to lose its shape and functionality. That’s where baseball glove repair comes in.

In this article, we’ll share five essential tips to help you extend the life of your favorite glove. From fixing torn laces to restoring the pocket, we’ve got you covered. Whether you’re a beginner or a seasoned player, these tips will save you money and keep your glove in top shape. So, dust off that old glove, grab your tools, and let’s get started on giving your trusted companion a new lease on life.

With these simple techniques, you’ll be back on the field, ready to catch that line drive in no time. Get ready to make your favorite glove last longer and keep the love for the game alive.

A well-maintained glove provides a secure and comfortable fit, allowing you to make precise catches and throws. It also helps you maintain a good grip on the ball, preventing unnecessary errors during gameplay. By investing time in repairing and maintaining your glove, you’re essentially investing in your own performance on the field.

Furthermore, repairing your glove instead of replacing it can save you money in the long run. Quality baseball gloves can be expensive, especially those made from premium materials. By keeping your glove in good condition, you can avoid the need to purchase a new one every season.

So, don’t overlook the importance of repairing and maintaining your baseball glove. With proper care, you can enjoy your favorite glove for years to come.

Common Problems With Baseball Glove

Before we dive into the repair techniques, let’s take a look at some common problems you may encounter with your baseball glove. Recognizing these issues will help you identify the areas that require attention and repair

1. Torn Laces:

The laces in your glove can wear out or break over time. This can affect the structural integrity of the glove, making it less effective in securing the ball.

Tips to relace your baseball glove

2. Worn Out Padding:

The padding inside the glove can become compressed and lose its shape. This can result in a less comfortable fit and reduced ball control.

3. Loose Stitching:

The stitching that holds the glove together can come undone, leading to gaps and potential tears.

4. Damaged Pocket:

The pocket of the glove, where the ball is caught, can lose its shape and depth. This can make it harder to secure the ball during catches.

baseball glove pocket, baseball glove repair

5. General Wear and Tear:

Over time, the leather of the glove can become stiff, dry, or cracked. This can affect the overall flexibility and performance of the glove.

If you want to know more about baseball glove repair kits, check out this recommended blog. Now that you’re aware of some of these common problems, let’s move on to the essential tools and materials you’ll need for baseball glove repair. 

Essential Tools and Materials For Baseball Glove Repair

To successfully repair your baseball glove, you’ll need a few essential tools and materials. These items will help you tackle various repair tasks and ensure that your glove is restored to its former glory. Here’s what you’ll need:

1. Leather Conditioner:

A good leather conditioner will help soften and moisturize the leather, preventing it from drying out and cracking. Look for a conditioner specifically designed for baseball gloves.

2. Leather Laces:

If your glove’s laces are torn or worn out, you’ll need replacement laces. Make sure to choose laces that match the color and thickness of your original laces.

3. Needle and Thread:

A strong needle and durable thread are essential for repairing loose stitching and tears. Choose a thread that is specifically designed for leather repair.

4. Padding Material:

If your glove’s padding has lost its shape, you may need to replace it. Look for foam or batting material that is similar in thickness and density to the original padding.

5. Rubber Mallet:

A rubber mallet can be used to reshape the pocket of your glove. This tool allows you to gently pound the pocket area, restoring its depth and shape.

Now that you have the necessary tools and materials, let’s move on to the step-by-step guide on cleaning your baseball glove.

Step by Step Guide To Cleaning Your Baseball Glove

Cleaning your baseball glove is an important step in the repair process. It helps remove dirt, sweat, and grime that can accumulate over time, restoring the leather’s natural shine and flexibility. Follow these steps to clean your glove effectively:

1. Remove Excess Dirt:

Use a soft brush or cloth to gently remove any loose dirt or debris from the surface of the glove. Pay extra attention to the seams and crevices.

2. Prepare a Cleaning Solution:

Mix a small amount of mild soap or leather cleaner with warm water in a bowl. Avoid using harsh chemicals or solvents, as they can damage the leather.

3. Dampen a Cloth:

Dip a clean cloth into the cleaning solution, making sure it is not overly saturated. Wring out any excess liquid.

4. Gently Clean The Glove:

Wipe the entire surface of the glove with the damp cloth, applying light pressure. Focus on areas that are particularly dirty or stained. Avoid rubbing too hard, as this can damage the leather.

5. Remove soap residue:

Dampen another cloth with clean water and wipe away any soap residue from the glove. Make sure to remove all traces of soap to prevent it from drying out the leather.

6. Apply Leather Conditioner:

Once the glove is dry, apply a small amount of leather conditioner to a clean cloth. Gently rub the conditioner into the leather, focusing on areas that are dry or cracked. Allow the conditioner to absorb into the leather for a few minutes.

7. Wipe Off Excess Conditioner:

Using a clean cloth, wipe off any excess conditioner from the glove. The leather should feel soft and supple, with a slight sheen.

By following these steps, you’ll have a clean and well-conditioned glove that’s ready for the repair process. Let’s move on to fixing minor tears and holes in your baseball glove.

How To Fix Minor Tears and Holes in Your Baseball Glove

Minor tears and holes in your baseball glove can be easily repaired with a needle and thread. Follow these steps to fix them:

1. Prepare The Needle and Thread:

Thread a strong needle with a durable thread that matches the color of your glove’s laces. Make sure the thread is long enough to sew through the tear or hole.

2. SecureTthe Torn Edges:

Use a small amount of clear adhesive or glue to secure the torn edges of the leather. This will prevent the tear from widening during the repair process.

3. Start Stitching:

Begin stitching from the inside of the glove, pushing the needle through the leather and pulling the thread tight. Make small, even stitches along the tear, ensuring that the thread is securely holding the leather together.

4. Continue Stitching:

Stitch all the way to the end of the tear, making sure to maintain even tension on the thread. Once you reach the end, tie a secure knot to secure the thread.

5. Trim Excess Thread:

Carefully trim any excess thread, ensuring that the knot is secure and hidden within the leather.

By following these steps, you’ll be able to repair minor tears and holes in your glove, restoring its functionality and appearance. But what about restoring the shape and form of your baseball glove? Let’s find out in the next section.

Restoring The Shape and Form of Your Baseball Glove

Over time, the shape and form of your baseball glove can become distorted, affecting its performance. Fortunately, there are techniques you can use to restore its shape and form. Here’s how:

1. Softening The Leather:

Apply a small amount of leather conditioner to the entire baseball glove, focusing on areas that are stiff or dry. Massage the conditioner into the leather, allowing it to penetrate and soften the material.

2. Shaping The Pocket:

To restore the depth and shape of the pocket, use a rubber mallet. Place a softball or baseball in the pocket and gently tap the area with the mallet. This will help reshape the pocket, making it more secure for catching the ball.

3. Creating a Pocket Mold:

If your baseball glove’s pocket needs more shaping, you can create a pocket mold using a folded towel or a baseball wrapped in a cloth. Place the mold inside the pocket and secure it with rubber bands. Leave the mold inside the pocket for a few days to help it retain its shape.

4. Reforming The Fingers:

If the fingers of your baseball glove have lost their shape, you can use a glove steamer or hot water to help reform them. Soften the leather with steam or hot water, then use your hands to shape the fingers to their original form. Allow the glove to dry naturally, avoiding direct heat sources.

By following these techniques, you’ll be able to restore the shape and form of your baseball glove, ensuring that it performs at its best on the field. However, prevention is key when it comes to extending the life of your glove. Learn more about restoring the shape of your baseball glove. Let’s explore some preventative maintenance tips in the next section.

Preventative Maintenance Tips For Extending The Life of Your Baseball Glove

To keep your baseball glove in top shape and extend its lifespan, it’s important to practice preventative maintenance. Here are some tips to help you maintain your glove:

1. Store It Properly:

When not in use, store your baseball glove in a cool, dry place. Avoid exposing it to direct sunlight, extreme temperatures, or excessive moisture, as these can damage the leather.

2. Use It For Its Intended Purpose:

While it may be tempting to use your baseball glove for other activities, such as playing catch with a dog or using it as a makeshift oven mitt, it’s best to use it solely for playing baseball. This will prevent unnecessary wear and tear.

3. Clean It Regularly:

As mentioned earlier, regular cleaning is essential to remove dirt and sweat buildup. Make it a habit to clean your glove after each use to prevent dirt from accumulating and damaging the leather.

4. Avoid Excessive Moisture:

While some moisture is necessary to keep the leather supple, excessive moisture can cause the leather to deteriorate. Avoid playing with a wet glove or leaving it in a damp environment for extended periods.

5. Recondition The Leather:

Every few months, apply a small amount of leather conditioner to your glove. This will help maintain its flexibility and prevent the leather from drying out or cracking.

By following these preventative maintenance tips, you’ll be able to extend the life of your baseball glove and maximize its performance on the field.

Where To Find Professional Baseball Glove Repair Services

While the techniques mentioned in this article are suitable for minor repairs and maintenance, there may be instances where professional help is required. If your glove requires extensive repairs or if you’re not confident in your repair skills, it’s best to seek the assistance of professional baseball glove repair services.

These services have the expertise and specialized tools to handle complex repairs and restore your glove to its original condition. They can also provide valuable advice on how to properly care for your glove to prevent future damage.

To find professional baseball glove repair services, you can start by asking for recommendations from fellow baseball players or coaches. You can also search online for local repair shops or contact the manufacturer of your glove for recommendations. We’ve got your back with top-notch baseball glove repairs services right here. Just give us a shout, and we’ll make that glove game-ready in no time.